Cookies

Cookie Witch Hats

NESTLÉ® TOLL HOUSE®
Cookie Witch Hats
Recipe Info - Skill Level
Level
Easy
Recipe Info - Prep Time
Prep 
1 hr
Recipe Info - Cook Time
Cook 
10 min
Recipe Info - Serving Size
Servings
24 hats

Cookie Witch Hats are the perfect solution when you are looking for a treat to bring to that Halloween party or special gift for your favorite ghoul or goblin. Using our refrigerated chocolate chip bar dough as the brim of this hat, sugar cones can be frosted, decorated and attached to make these deliciously cute cookie witch hats.

Cookie Witch Hats is a fun and festive recipe brought to you by NESTLÉ® TOLL HOUSE®. Whether you're gearing up for a spook-tacular Halloween party or simply want to surprise your little ghouls with a delightful treat, these cookie witch hats won't disappoint.

Start with NESTLÉ® TOLL HOUSE® Refrigerated Chocolate Chip Cookie Bar Dough to create the brims of the hats. The dough bakes into perfectly chewy cookie bases that provide just the right texture balance for the crunchy sugar cone hats. Once baked, frost the sugar cones and add an assortment of decorator icings, sugars, and sprinkles for a charmingly witchy finish.

Crafting these cookie witch hats is an easy recipe that's perfect for all skill levels, making it an ideal activity to enjoy with kids or as a quick, crowd-pleasing dish for a Halloween party. The combination of rich, chocolatey cookies and the creative decoration possibilities ensures these whimsical treats will be the highlight of any spooky celebration.

So, gather your ingredients and follow this kid-friendly, nut-free, and easy recipe to create a batch of cookie witch hats that will enchant everyone who takes a bite!

Ingredients

Make It

Step 1

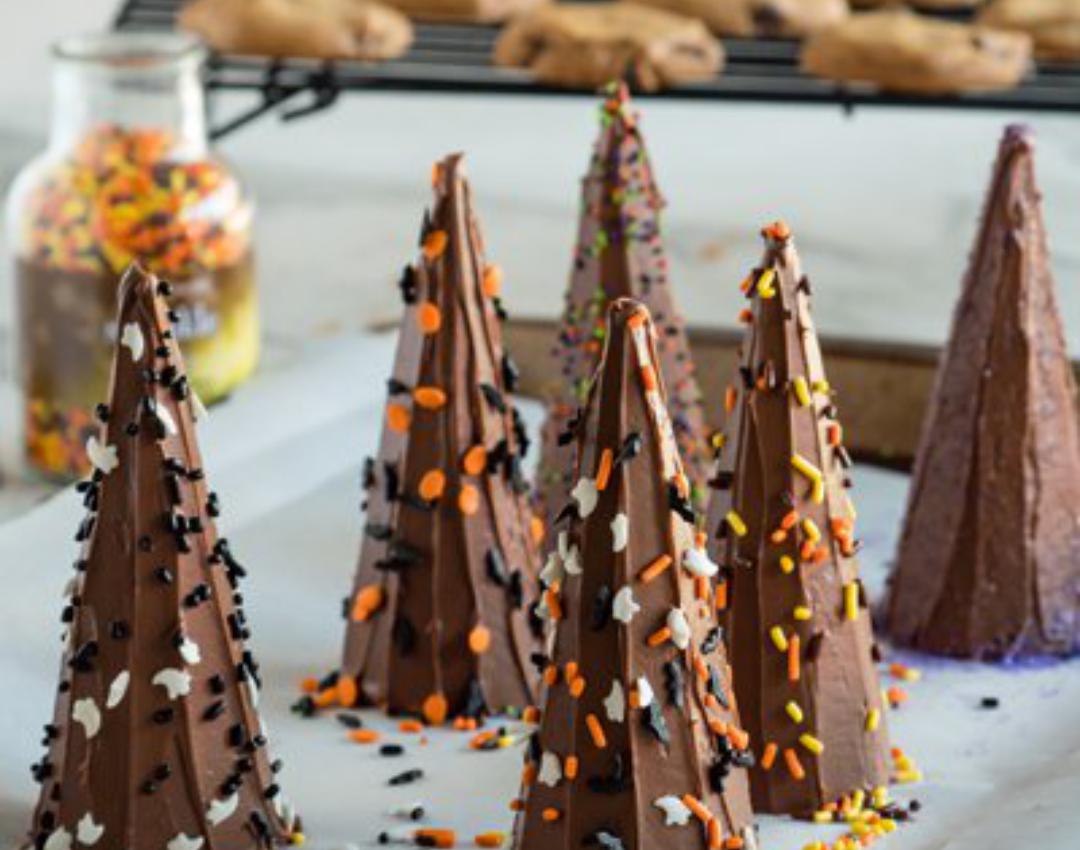
Line large baking sheet with sides with wax paper. With a small metal spatula or butter knife, spread a thin layer of frosting on each cone (Be sure to save some frosting to adhere cones to cookie hat base! About 3/4 cup will be needed.) Place frosted cones on baking sheet. Sprinkle with sugars and sprinkles. Let stand for 1 hour to allow frosting to set.

Step 2

Meanwhile, prepare cookies as directed on package. Cool completely.

Step 3

Fill a quart-size plastic food storage bag with remaining icing; seal. Cut 1/4-inch corner from bag. Squeeze bag to pipe icing around bottom of each cone; adhere cones to each cookie to form hats. To decorate base of hat, use different colors of decorator icings and sprinkle with additional sugars or sprinkles.

Ingredients

Everybody Needs a Little Inspiration

Don't miss irresistible recipes, exciting news and sweet surprises.

What People Are Saying